Detailed guide: How to get started with Wallet Subscriptions?
with ArbitrageScanner!
We have prepared for you a text version of the Wallet Subscriptions setup guide
Wallet Subscriptions - a service that allows you to track transactions of wallets of interest to you via notifications in your Telegram feed.
To create a new subscription, go to the “My Subscriptions” tab (item #1) and click on the "Add” button (item #2)
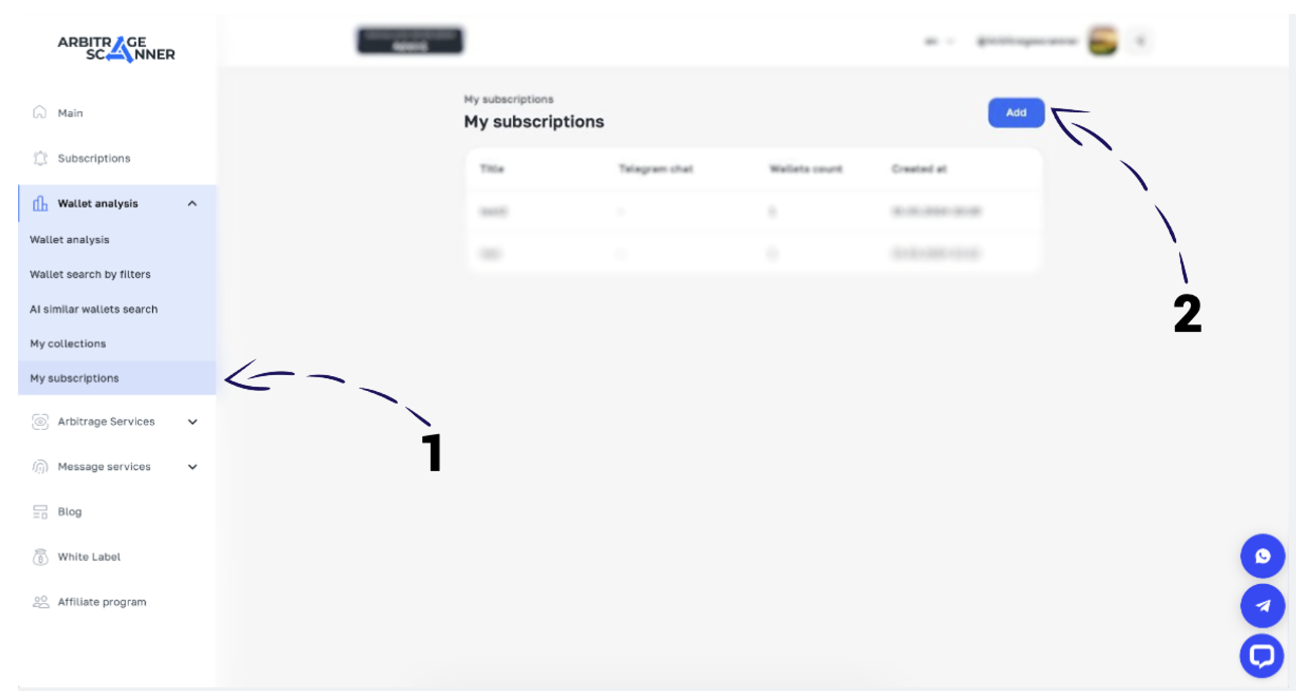
After clicking on the button, a window will open for you to create a subscription.
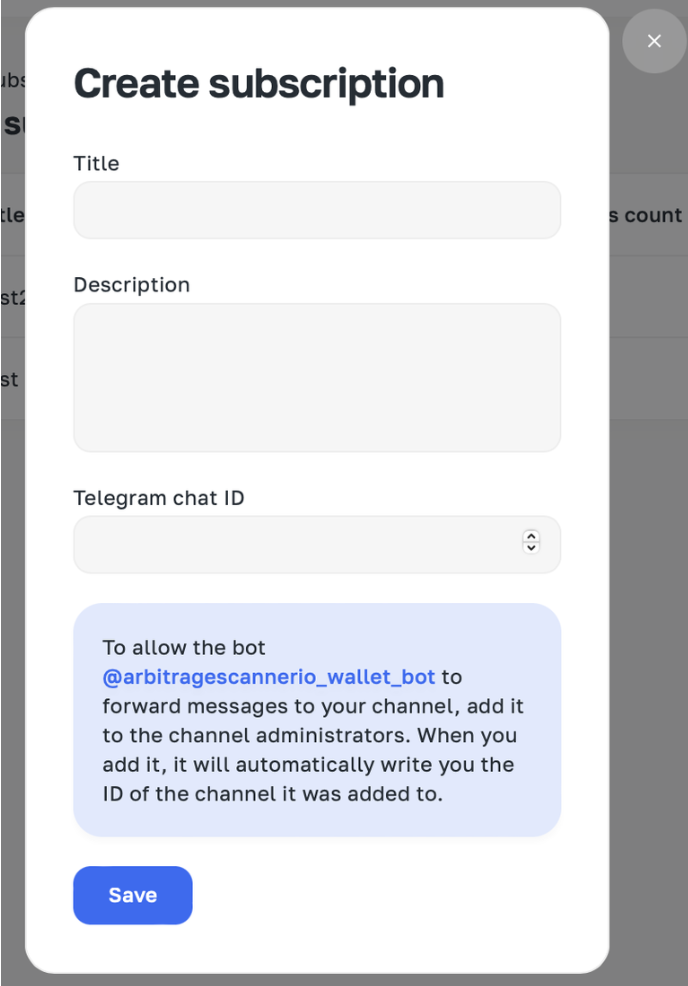
You need to fill in the basic fields:
- Title — a title of your subscription, it can be any
- Description — a description of your subscription, it can be any
- Telegram Chat ID:
- You need to create a Telegram channel (one Telegram channel per subscription), in which you will receive notifications about transactions of the tracked wallets. After creating the channel, you need to add the telegram bot @arbitragescannerio_wallet_bot there and grant it all administrative rights:
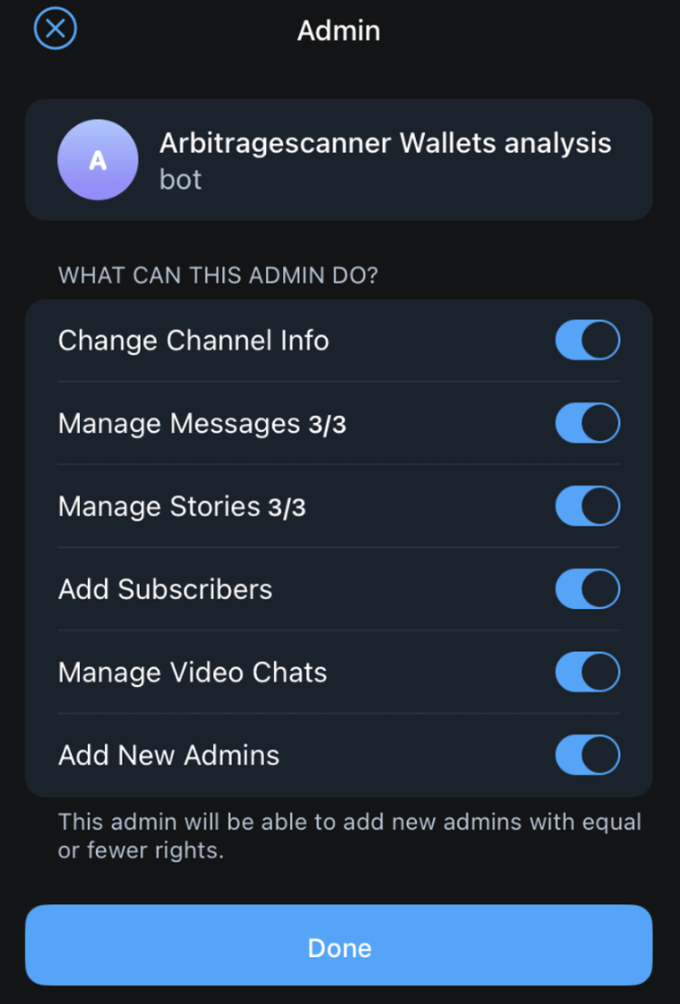
- After adding the bot to the channel, it will automatically send you a notification with the channel ID in the format: “Chat ID: -000000000000”
- When filling in the “Telegram Chat ID” field, you must enter the ID along with the minus sign at the beginning
- After filling in all the fields, click on the “Save” button
After saving a new subscription, a page will open for you to set up a subscription:
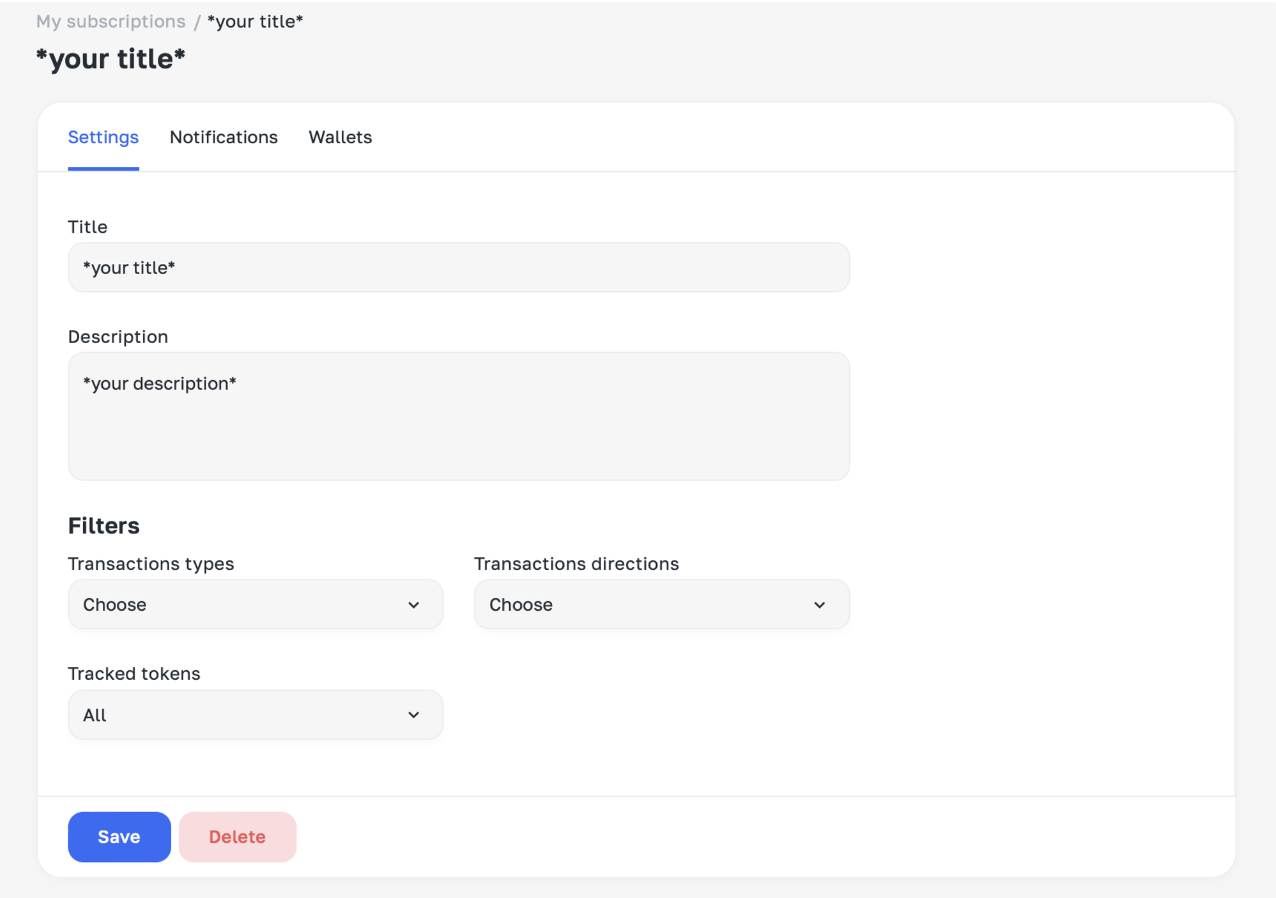
- The title and description are filled in automatically, since you have already entered this data when creating a subscription
Filters:
-
Transaction types — In this filter, you can select the transactions of the tracked wallets that you want to receive notifications about.
-
Transaction types available for selection:
- DEX trade is a transaction of the type “Swap”, which imply the exchange of one cryptocurrency for another.
- Transfer — transactions in which the user either sends or receives a certain amount of cryptocurrency.
- Outgoing transfer is a transaction in which the user sends a certain amount of cryptocurrency to another wallet
- Incoming transfer is a transaction in which the wallet receives a certain amount of cryptocurrency as a result of the transfer.
- Approve — transactions in which the user allows another address or contract to use a certain amount of cryptocurrency on his wallet.
- Execute — transactions during which a smart contract was invoked, but the action was not uniquely classified
- NFT — transactions in which there was any interaction with NFT
- Other — all the other transaction types that were not listed above.
-
Transactions directions — a filter for selecting the direction of transactions of the tracked wallets that you want to receive notifications about.
- Send — transactions in which the wallet address is the “sender”
- Receive — transactions in which the wallet address is the “recipient”
-
Tracked tokens — a filter for selecting categories of tokens that should participate in transactions of the tracked wallets that you want to receive notifications about:
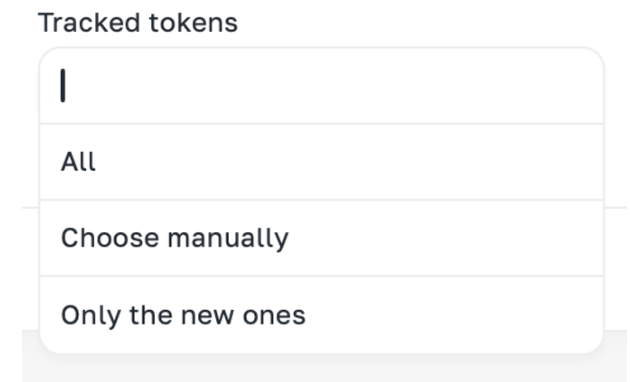
- All — if you select this option, you will receive notifications on transactions of the tracked wallets corresponding to the above-filled filters, regardless of which tokens participated in the transactions.
- Choose manually — if you select this option, you will have the opportunity to independently add smart-contracts of those tokens, that you are interested in, in transactions of the tracked wallets. After selecting the option, a field will open for you to fill in the list of tokens:

To add a token, enter its smart contract in the field:

Then click on the add button:

The token has been successfully added to the list!

- Only new ones are tokens that have not previously participated in wallet transactions that were notified.
- Then, go to the notification settings page:
- The “Telegram chat ID” field will be filled in automatically if you have already entered this data when creating a subscription, if you did not enter this data, go back to the first paragraph of the instructions and enter the chat ID.
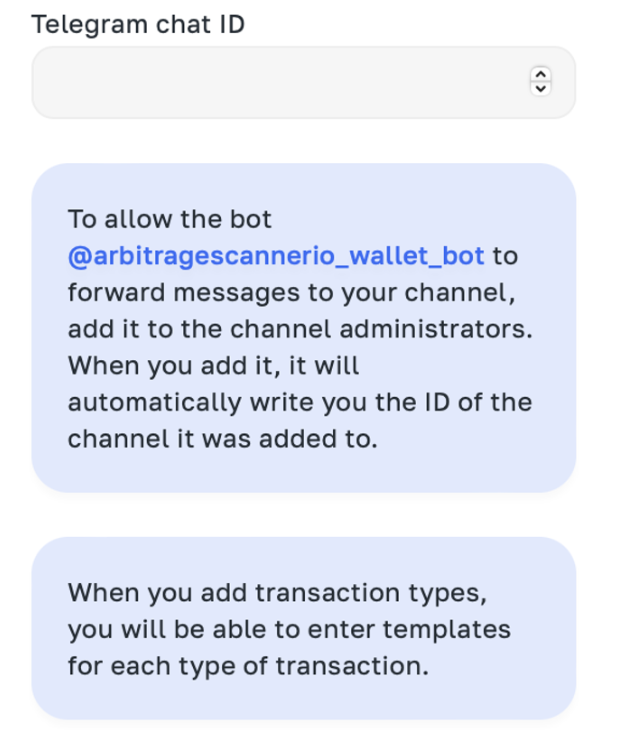
For each selected transaction type, a notification template will be generated on the previous settings page, for example:
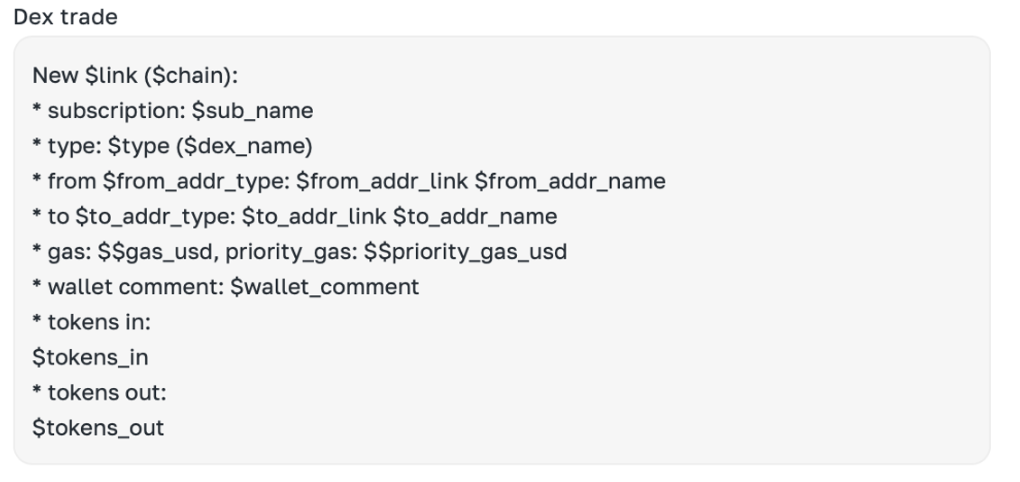
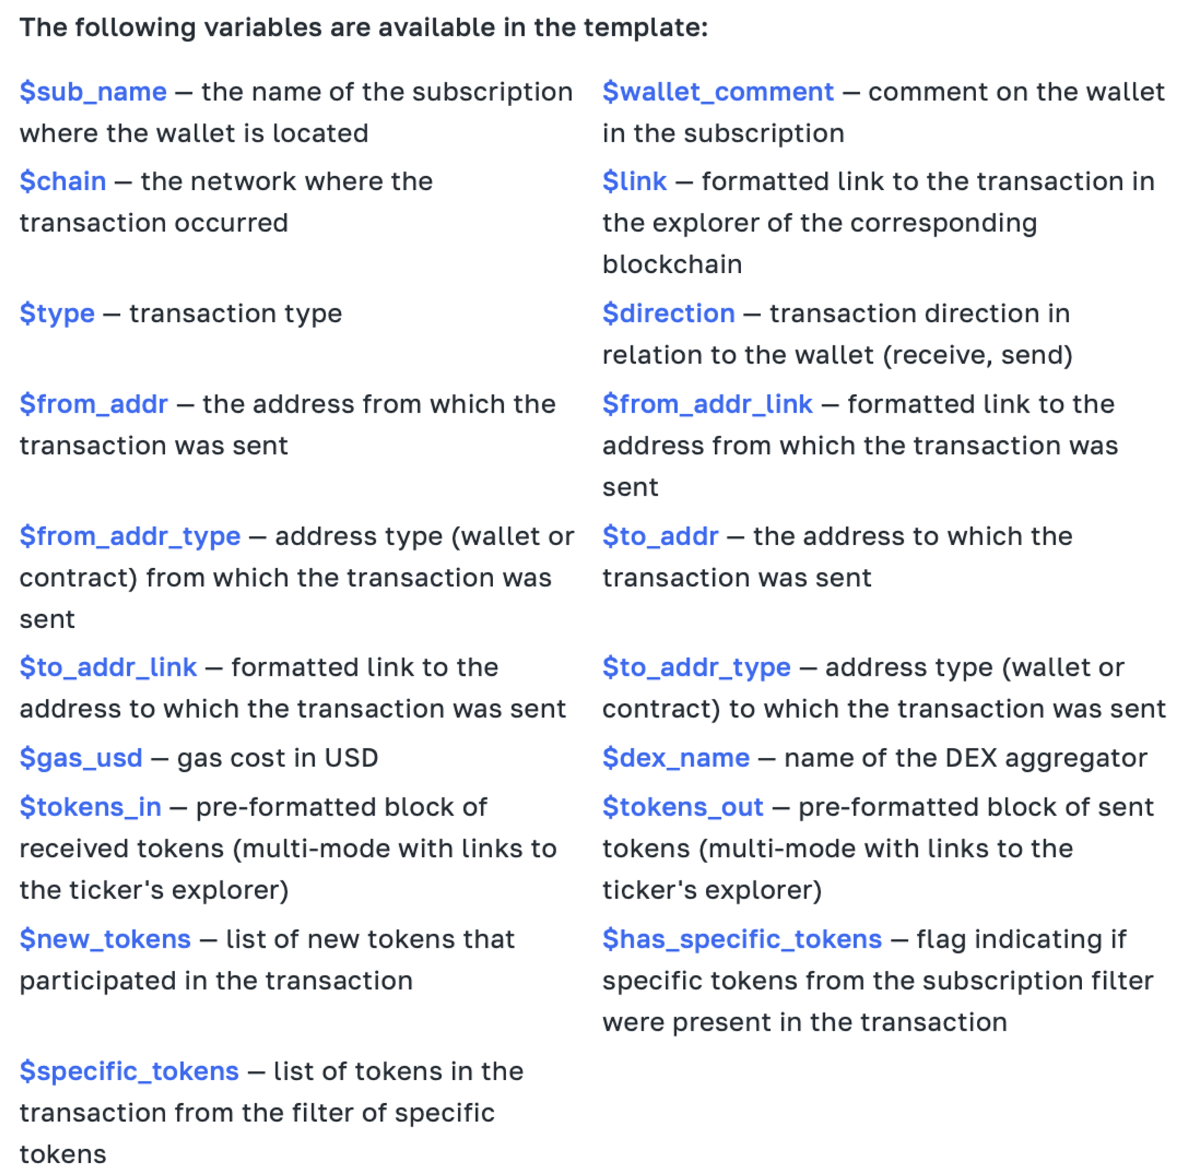
Under the template of each notification, there are all the parameters that you can use in the notification are listed.
After setting up all notifications, go to the page for adding wallets:
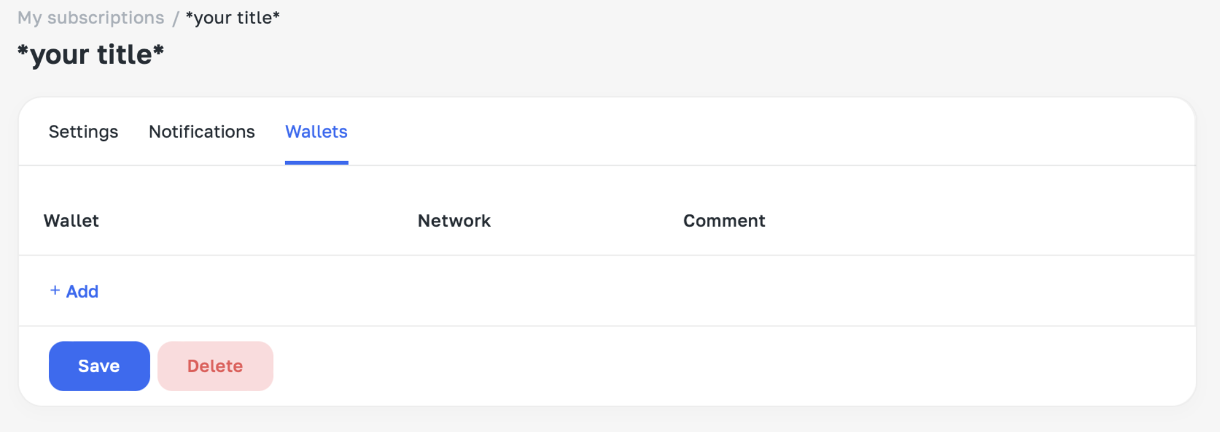
To add a new wallet to the subscription, click on the “Add” button, after which a window opens for entering wallet data:
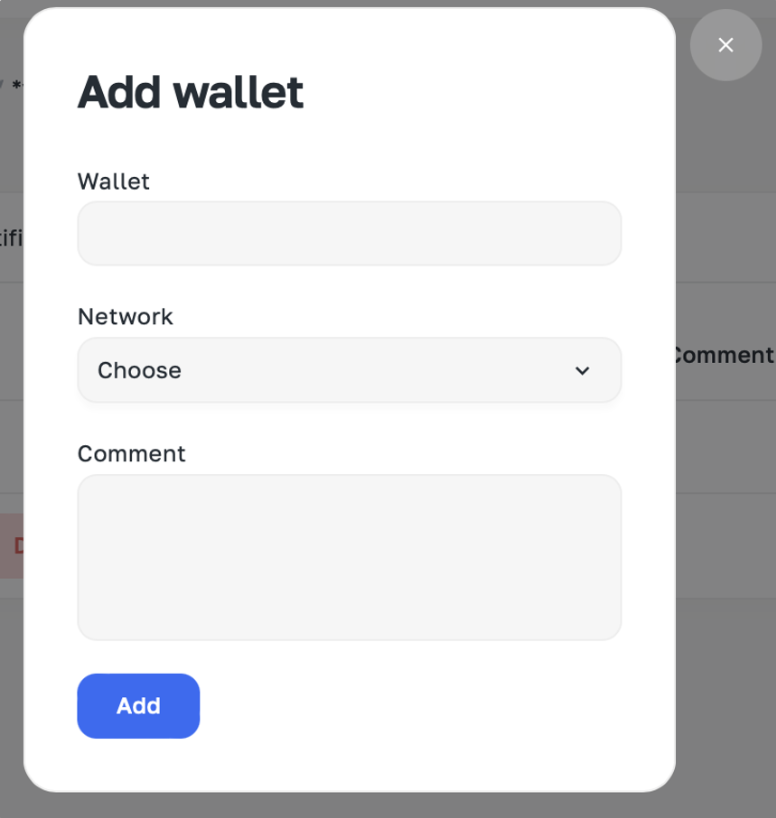
- Wallet — here you need to enter the wallet address
- Network — here you need to select the network in which you want to track transactions
- Comment — here you can add a comment to the wallet.
After adding all the wallets you want to track, click on the “Save” button — now your subscription is saved, and you will start receiving notifications about wallet transactions corresponding to the entered settings!
Want to learn more about crypto arbitrage?
Get a subscription and access the best tool on the market for arbitrage on Spot, Futures, CEX, and DEX exchanges.


